
Add Donor
Updated last week
.
CORE FEATURES
Add Donor
Use Add Donor when you need to create a donor record from the admin Donors page. The donor is created inside a specific donor profile/form view, so Gratona knows which donor fields, communication options, and custom fields to use.
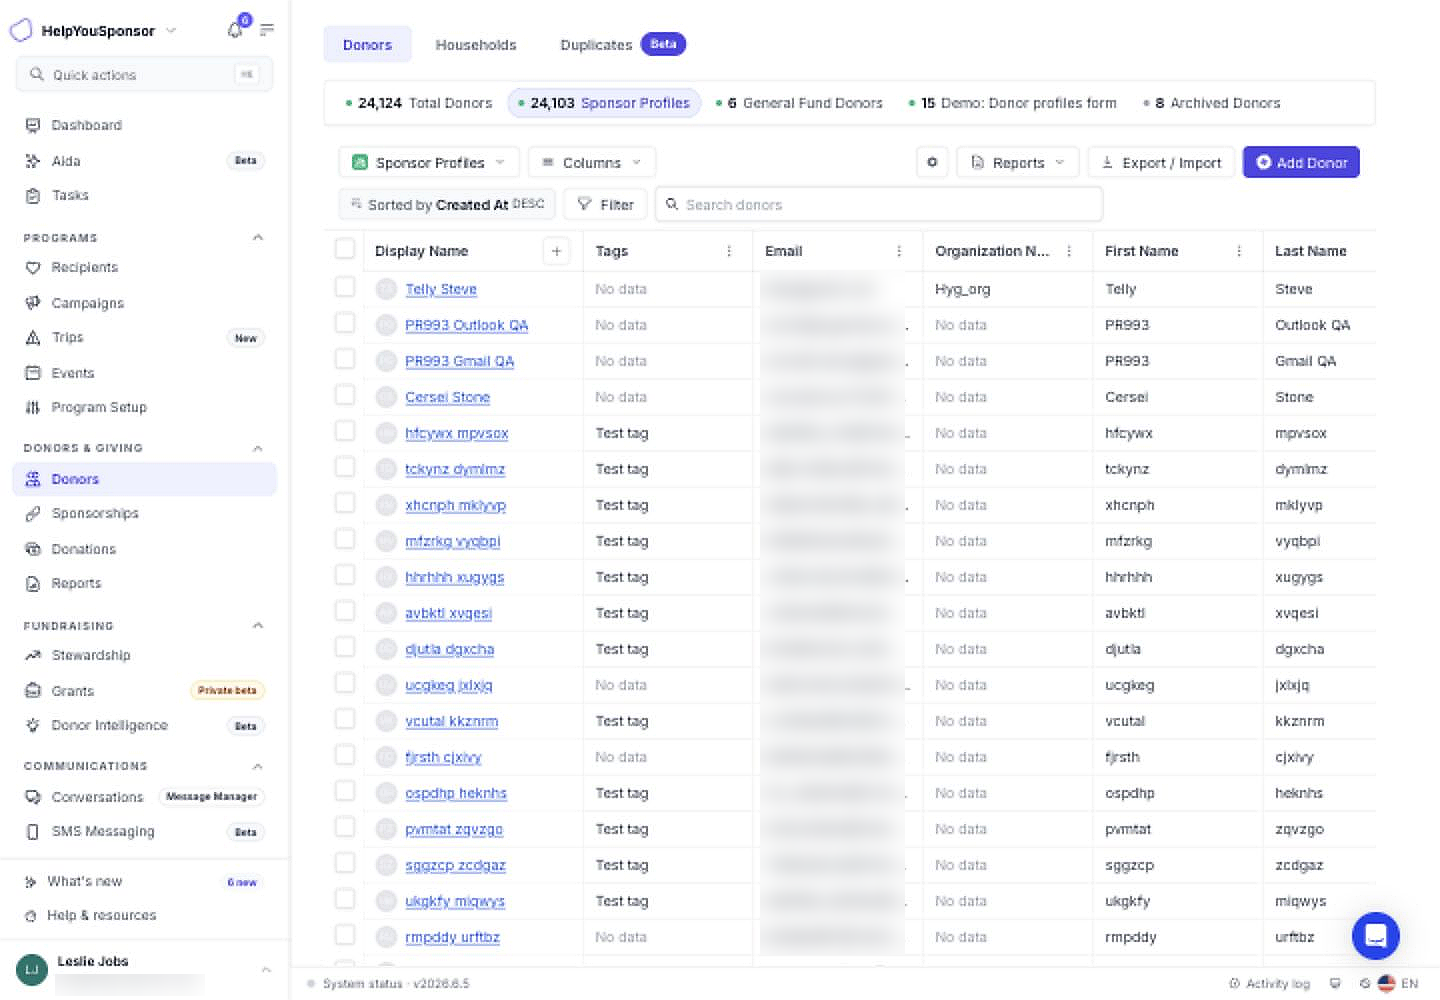
Select a specific donor profile or form view before adding a donor.
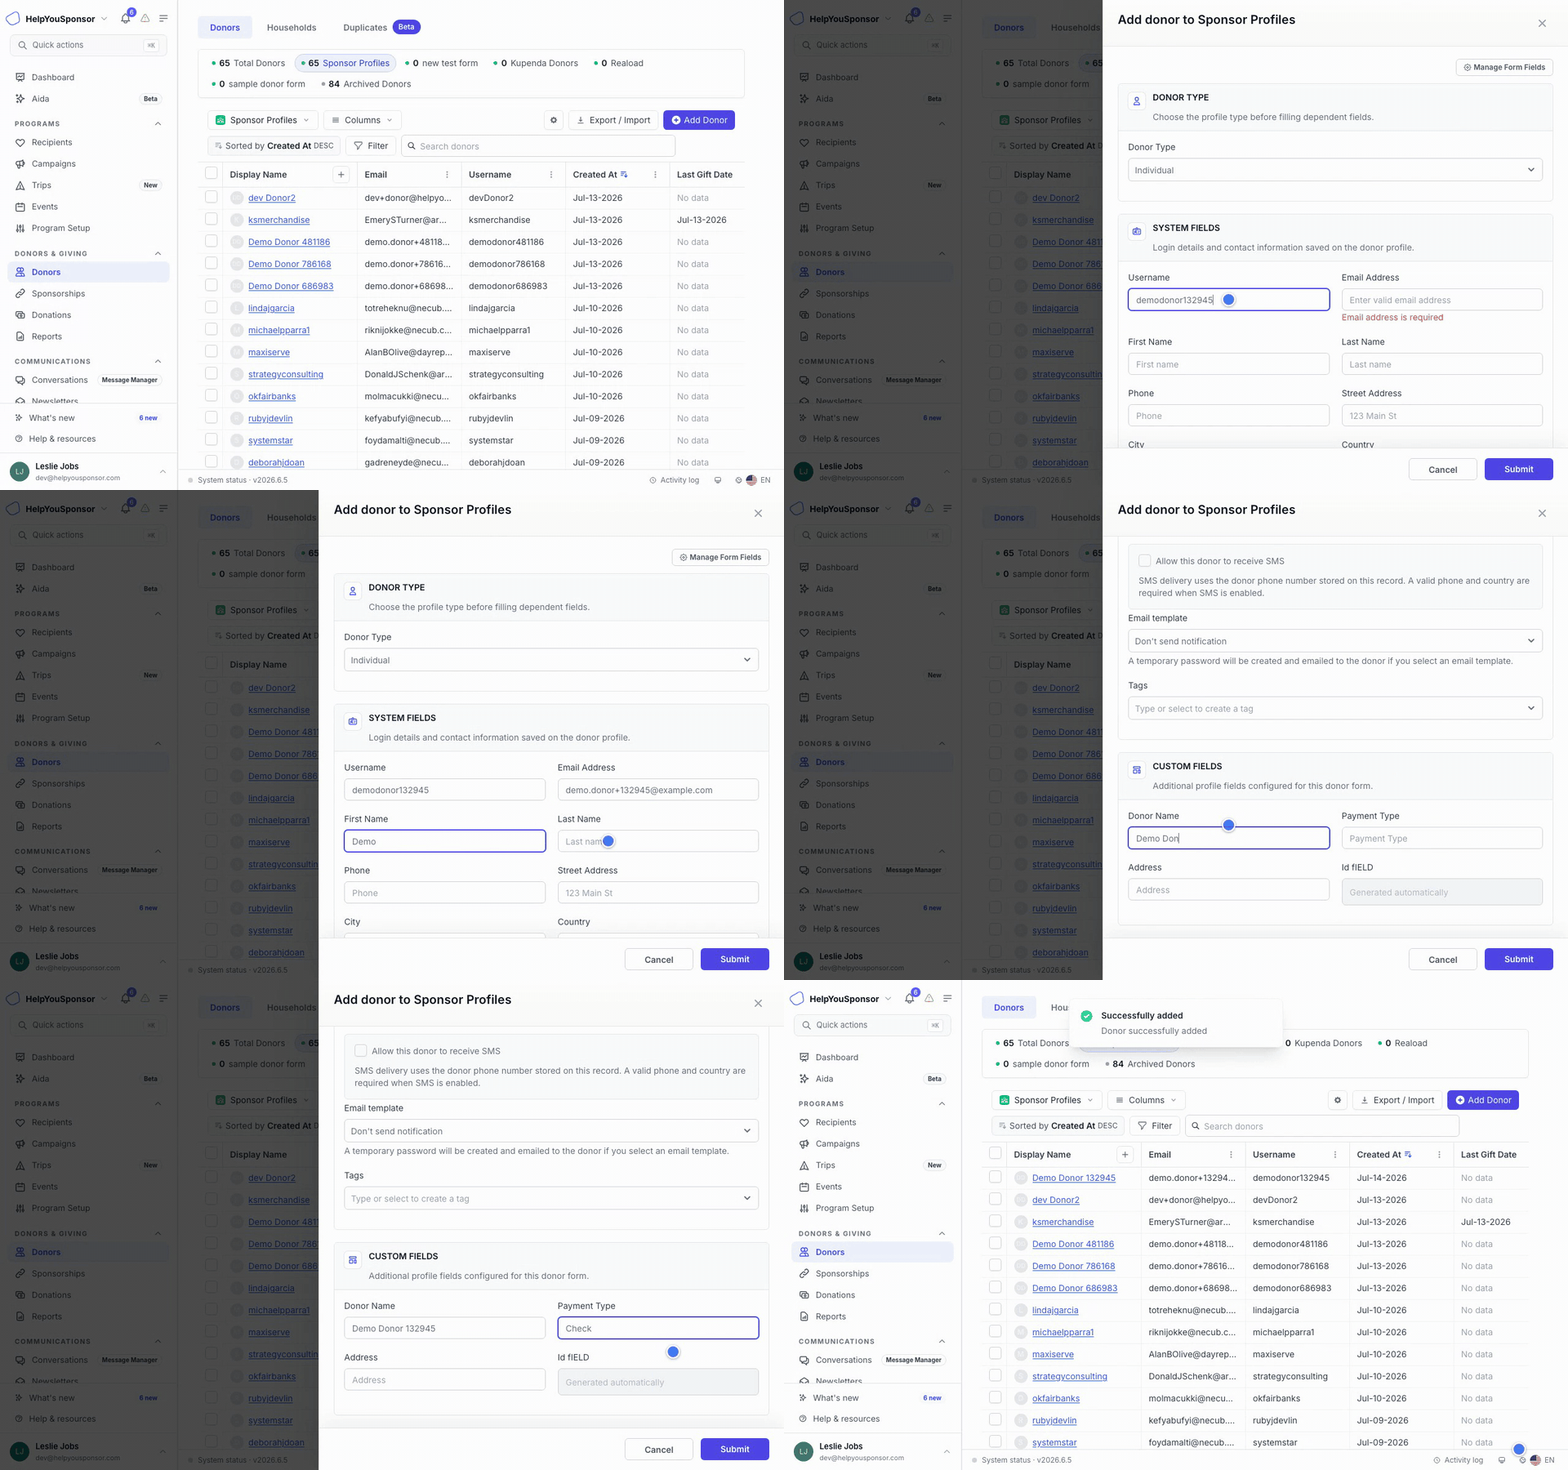
Walkthrough: adding a donor from the Donors page.
Choose the Donor Profile First
Open Donors from the sidebar, then choose the donor profile or donor form view that should store the new donor.
Add Donor is disabled in the all-donors or total-donors view because those views combine records from more than one donor form. Select a specific donor form view, such as a sponsor profile or general fund donor view, before adding the record.
Add the Donor
Open Donors.
Select the donor profile/form view you want to add the donor to.
Select Add Donor.
Choose whether the donor is an Individual or Organization.
If you chose Organization, select the Organization type: Regular organization, DAF sponsor, or IRA custodian.
Complete the required system fields.
Choose the communication options.
Complete any custom fields on the donor form.
Select Submit.
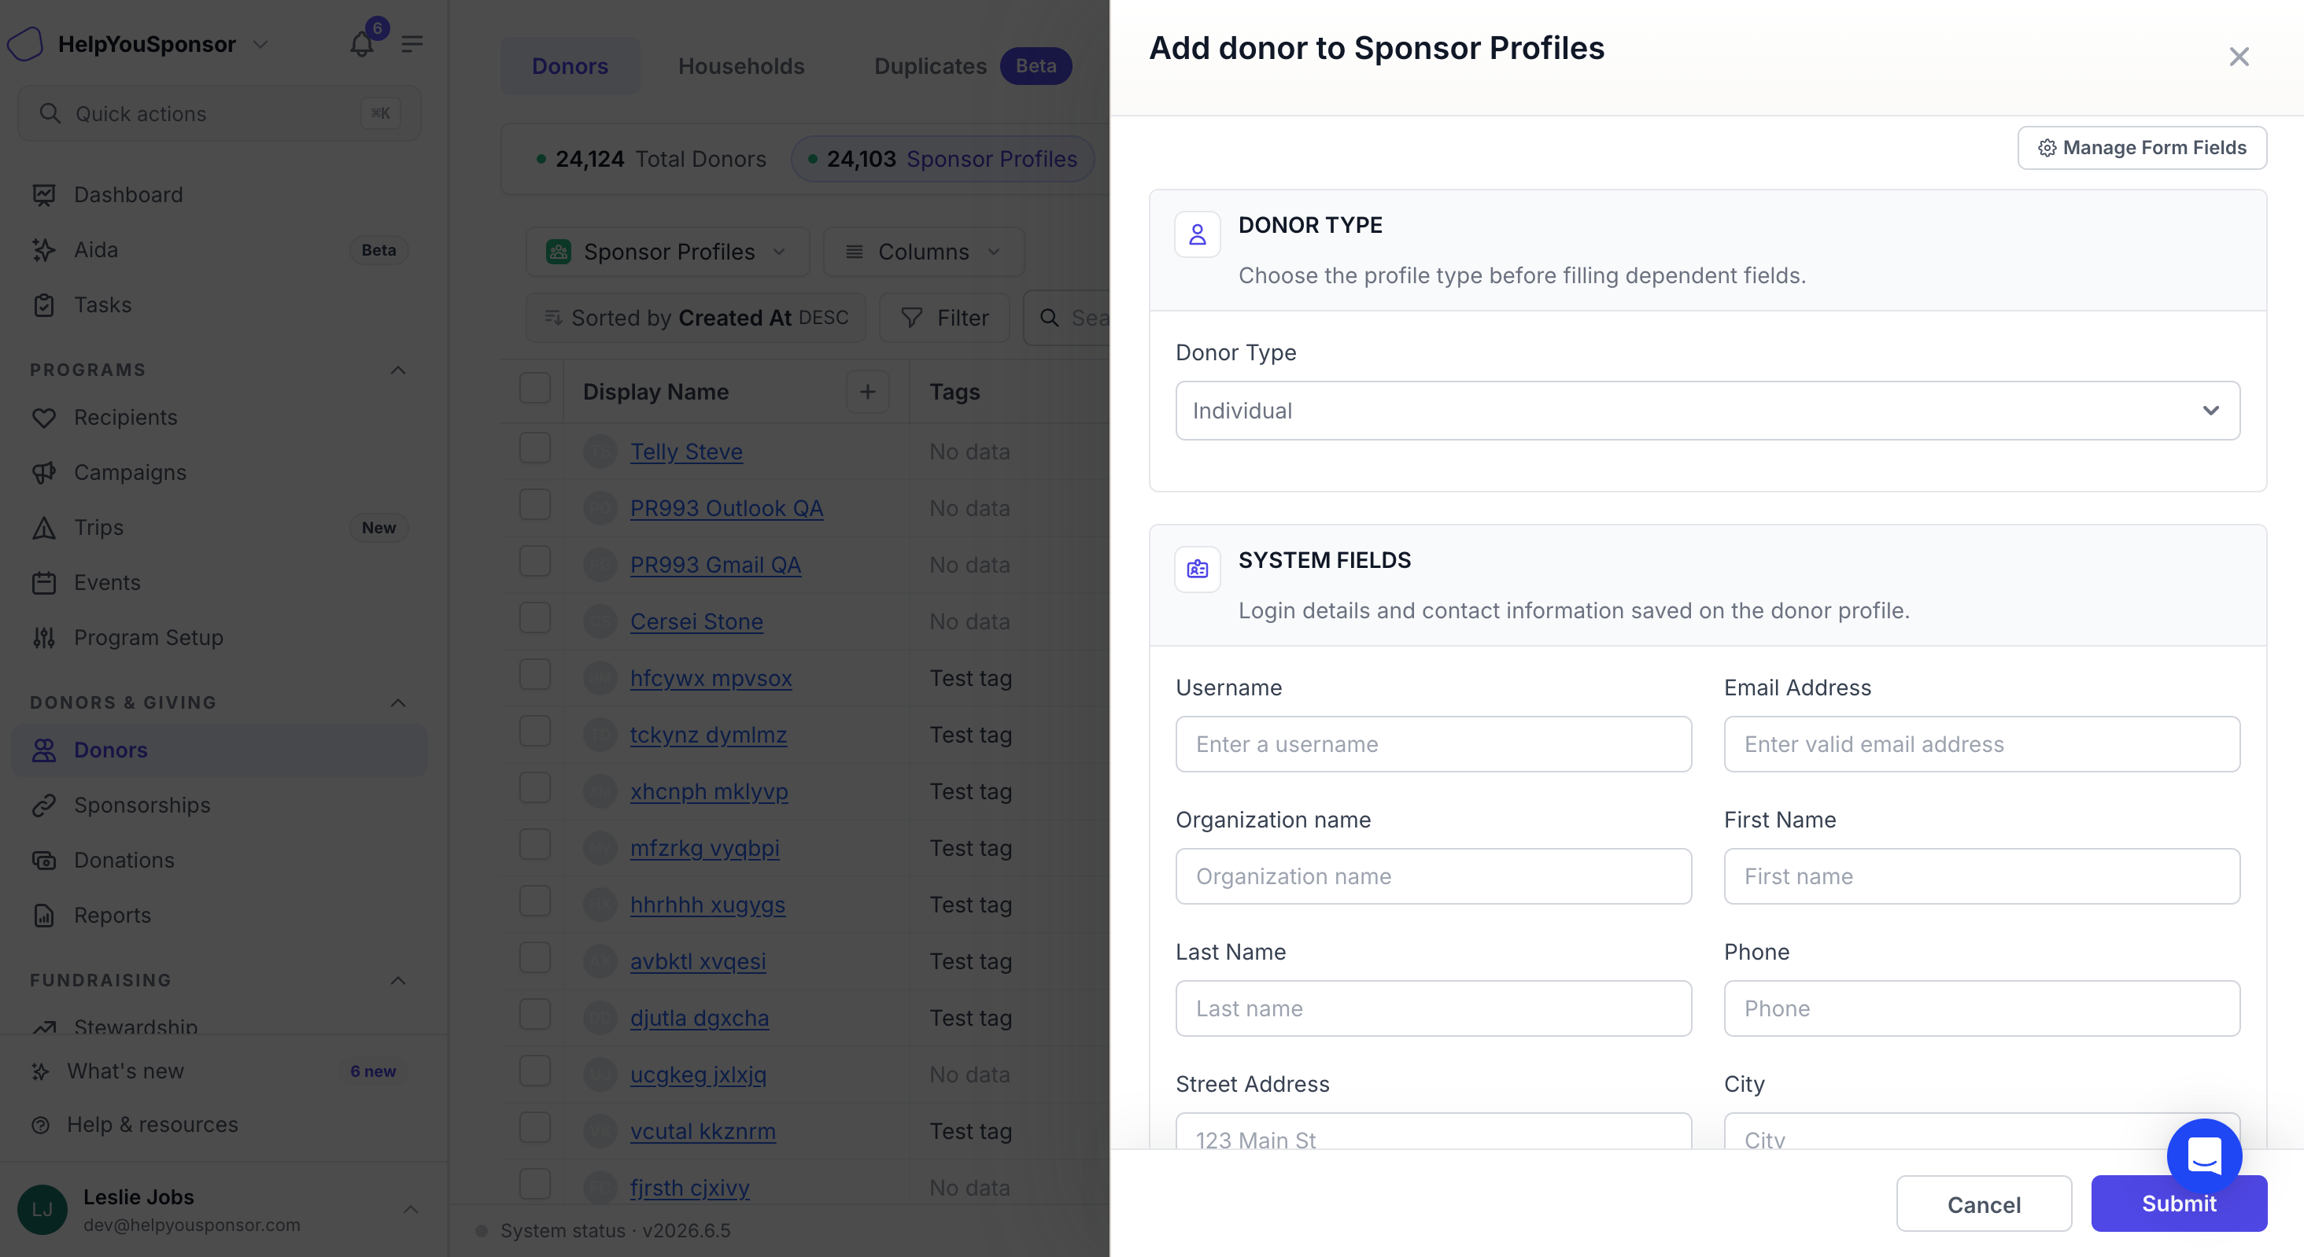
The Add Donor drawer starts with donor type, account fields, and standard donor information.
Fill it in from a photo or document
For business cards, handwritten forms, or scans, use AI Intake from the Add Donor drawer. Select Scan or upload under Have it on paper?, or use the compact Fill from a photo or document link after dismissing the banner. AI Intake reads the document into a draft that you review and save; nothing is created until you save. See Add recipients or donors from a photo or document (AI Intake).
Choose the Donor Type
Use Donor type to decide whether the record represents a person or an organization.
Individual donors use personal donor fields. Organization donors require an organization name and may show organization-specific fields when the donor form is configured that way.
Complete Required Fields
The fields you see depend on the donor form selected in the Donors view.
Common requirements include:
Username: required for individual donors and ordinary organization records, and must be at least five characters.
Email: required for individual donors and ordinary organization records unless the donor form allows donors without email addresses.
Organization name: required when the donor type is Organization.
Organization type: shown when the donor type is Organization. Choose Regular organization, DAF sponsor, or IRA custodian. A new DAF sponsor or IRA custodian profile needs no username, email, or password: Gratona creates no login and sends no account-setup email, and a contact email you add is optional and is not a login. See Manage DAF sponsors, IRA custodians, and institution locations.
Standard donor fields: shown when the donor form uses Gratona's standard donor fields.
Custom fields: shown from the active donor form. Required custom fields must be completed before the donor can be submitted.
Custom fields can also depend on donor type. If the selected donor type has no custom fields, Gratona shows that no custom fields are configured for that donor type.
Set Communication Options
Use the communication section to decide what should happen after the donor is created.
Communication options and custom fields appear lower in the Add Donor drawer.
For individual donors and regular organization records, choose an email template or select Don't send notification. Choosing a template creates a temporary password and sends the selected account email. New DAF sponsor and IRA custodian profiles have no account-notification controls and receive no account-setup email.
The Communication section always shows an SMS consent checkbox, regardless of the donor form in use. SMS sending requires a valid phone number and country on the donor record.
If the account does not have the needed notification email sets available, the drawer may show setup guidance before you can add a donor that uses account notifications.
Change the Donor Form Fields
Use Manage Form Fields only when you need to change the donor form itself.
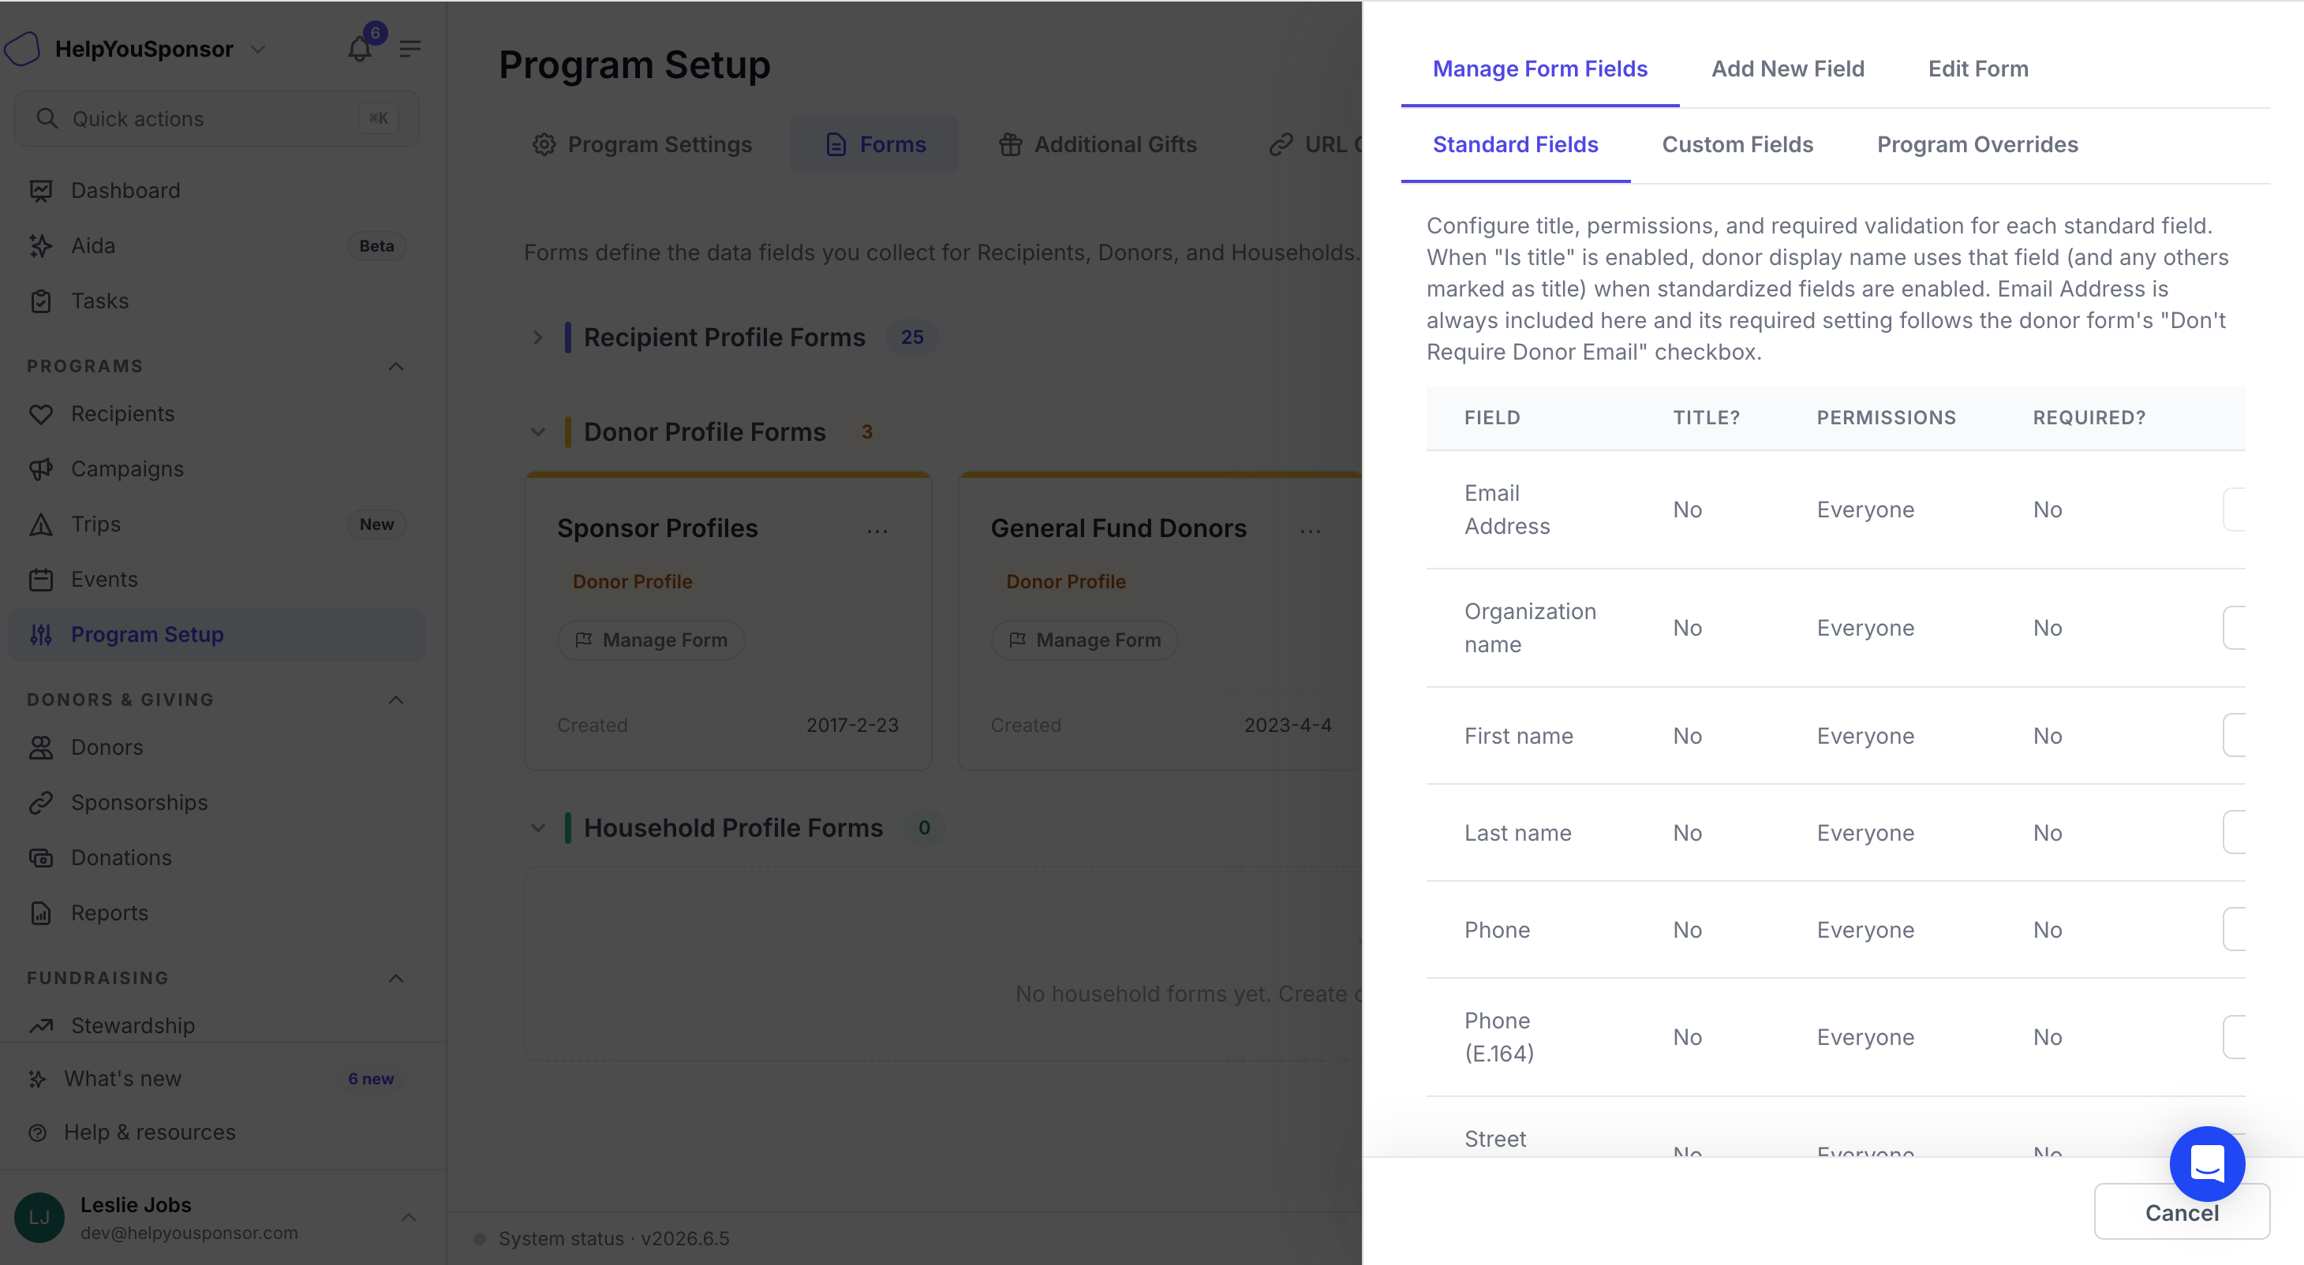
Manage Form Fields opens the field-management drawer for the active donor form.
Changes made in Manage Form Fields affect the donor form for future records and other places that use that form. Use the Donors table column controls when you only want to change which fields are visible in your table view.
Permissions
Your role controls whether you can add donors, edit donor records, manage donor form fields, or send donor notifications. If an action is missing or disabled, your account may not have that permission or the current donor view may not support the action.